
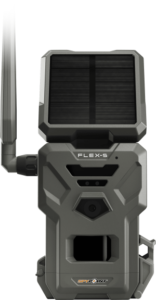
FLEX-S
Data transmission camera with SOlarpanel
General
SD cards
- The FLEX-S only works with micro SD cards
- Please use a micro SD card with a capacity of between 2 and 512 GB.
- Make sure that you only use Class 4 or Class 10 memory cards.
- Please format the memory cards before using them for the first time.
Power supply
- The FLEX-S works with the LIT-22 battery pack.
- Make sure that the battery is inserted correctly into the compartment, otherwise the camera may be damaged.
- The FLEX-S can also be operated completely without an external power supply
Status-LED
STATUS LED COLOUR | PATTERN | EXPLANATION |
Green | Lights permanently | When the camera is triggered or takes a photo or video |
Blue | Lights permanently | When a photo or video is transmitted |
Blue (flashing) | Flashes every second until reset is complete | Reset to factory settings |
Orange | Flashes every second for 30 seconds | Firmware-Update |
Red | Lights up permanently | No signal found |
Red (flashing) | Flashes slowly | Problem with SIM card / hardware problem |
Tipps und Vorgehensweise für die Aktivierung
Instruction manual
Quick start guide SPYPOINT FLEX-S
Assistent zur Fehlerbehebung
SOFTWARE
Please note:
The versions found here may differ from the versions on spypoint.com. The versions listed here have been extensively tested in Europe and are stable. We accept no responsibility for software versions from other sources!
Version:
V1.4.0-4
Improvements:
- General Stability Improvements
- Instant Mode Improvements
- Battery Life Improvements
- Many other bug fixes
Installation instructions (PC)
- Make sure that you use a class 10/U1 micro SD card with up to 512 GB.
- Format the micro SD card on a computer in FAT32. (Video)
- Download the update file.
- Open the downloaded .zip file by double-clicking on it.
- Copy the 2 files from the .zip file to the micro SD card. Note: If your SD card was previously FORMATTED with the Flex camera, you have 2 partitions, you must copy the 2 files to the largest partition.
- Check whether the copying process on your micro SD card was successful.
- Eject the micro SD card from the computer.
- Make sure that the camera is switched off.
- Insert the micro SD card into the device.
- Switch on the camera.
- The FLEX performs the firmware update automatically for about 5 minutes. The camera will restart several times.
- The camera will then go through the connection process.
- The firmware of the FLEX-S is up to date.
Installation instructions (MAC)
- Make sure that you use a class 10/U1 micro SD card with up to 512 GB.
- Format the micro SD card on a computer in FAT32. (Video)
- Download the update file.
- Open the downloaded .zip file by double-clicking on it.
- Copy the 2 files from the .zip file to the micro SD card. Note: If your SD card was previously FORMATTED with the Flex camera, you have 2 partitions, you must copy the 2 files to the largest partition.
- Check whether the copying process on your micro SD card was successful.
- Right-click on MacOS_PrepareSDCard.command on the micro SD card and select Open with Terminal to run the file.
- Eject the micro SD card from the computer.
- Make sure that the camera is switched off.
- Insert the micro SD card into the device.
- Switch on the camera.
- The Flex performs the firmware update automatically for about 5 minutes. The camera will restart several times.
- The camera will then go through the connection process.
- The firmware of the Flex-S is up to date.
Subscribe to the newsletter here!
Be the first to know about new products, software updates or promotions at spypoint.store!